Introduction to Wood Veneer Hub
Woodworking enthusiasts and artisans alike know that a wood veneer hub can be a transformative element in both aesthetic and functional projects. This guide aims to delve into the intricacies of creating a stunning wood veneer hub, including its significance in craftsmanship, types of materials used, challenges faced, and advanced techniques to elevate your woodworking projects.
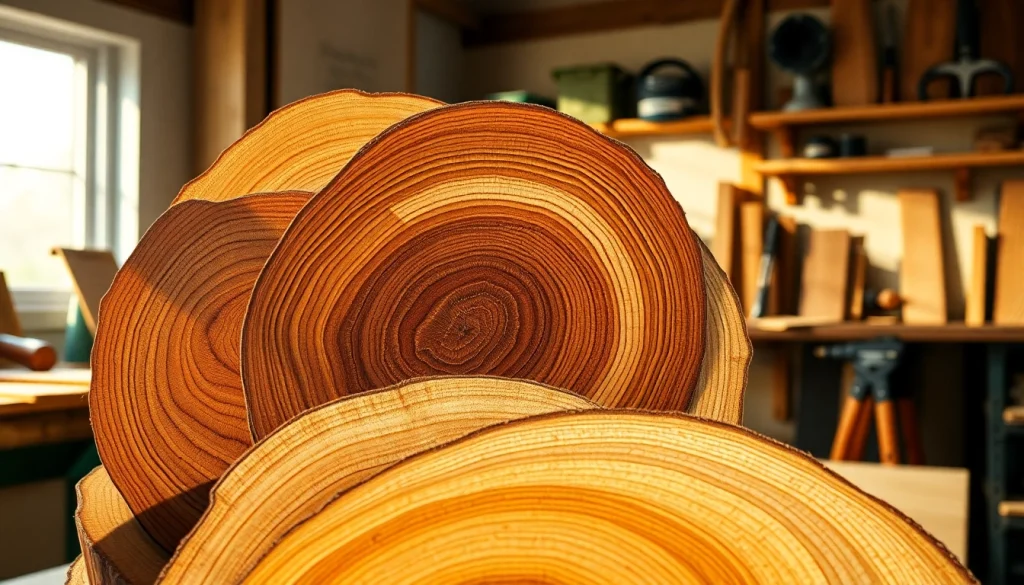
What is a Wood Veneer Hub?
A wood veneer hub serves as a central unit where thin layers of real wood, known as veneers, are adhered to a substrate, often made of plywood or particleboard. This hub allows craftspeople to create functional items like furniture, decorative pieces, and intricate projects that leverage the unique beauty of natural wood grain without the cost and weight of solid wood. The concept is anchored in the desire for material efficiency while still delivering premium quality aesthetics.
Importance of Wood Veneer in Craftsmanship
Wood veneer plays a critical role in craftsmanship for several reasons. First, it allows artisans to showcase different types of wood grain patterns, colors, and textures, offering a range of visual appeal in each project. Secondly, using veneers minimizes the use of precious hardwoods, supporting sustainable practices in woodworking. Lastly, veneer applications enable woodworkers to experiment with intricate designs and forms that may be difficult to achieve with solid pieces, promoting creativity and innovation in their work.
Key Benefits of a Wood Veneer Hub
- Cost-Effective: Utilizes less material while maintaining high-quality appearance.
- Lightweight: Easier to handle and transport compared to solid wood pieces.
- Diverse Aesthetic Options: Offers a vast selection of wood types and finishes to match various styles.
- Environmental Sustainability: Reduces wastage of hardwood through efficient use of veneer.
- Ease of Use: Simplifies complex woodcrafting techniques, making them accessible to hobbyists and professionals alike.
Materials Used in Wood Veneer Hub
Types of Wood Veneers Frequently Used
When selecting wood veneers for your hub, understanding the types available is essential. Commonly utilized veneers include:
- Oak: Known for its durability and distinctive grain patterns, oak veneer is a favored choice in furniture making.
- Maple: Offers a light color and smooth grain, making it ideal for contemporary designs.
- Walnut: Valued for its rich, dark hues and intricate patterns, walnut projects a luxurious appeal.
- Cherry: Characterized by its reddish tones that deepen over time, cherry veneer adds warmth to projects.
- Bamboo: An eco-friendly option that offers a modern twist with its linear pattern and sustainability credentials.
Choosing the Right Adhesives and Finishes
The quality of your wood veneer hub can greatly depend on the adhesives and finishes you select. Adhesives like PVA (polyvinyl acetate) are popular due to their strong bond, water resistance, and ease of use. For finishing, options such as oil finishes, varnishes, and lacquers can enhance the wood’s natural beauty while providing protection against wear and moisture. Selecting the correct combination ensures durability and visual appeal in your projects.
Essential Tools for Wood Veneer Projects
Successful wood veneer projects require specific tools to achieve professional results. Key tools include:
- Veneer Saw: Fine-toothed saw designed to make clean cuts without tearing the veneer.
- Glue Roller: A tool for applying adhesives evenly, helping to avoid lumps and bubbles.
- Clamps: Used to apply consistent pressure during curing; essential for a secure bond.
- Trimmer: For precise edge-cutting and finishing of veneer edges.
- Sandpaper: Different grits for smoothing surfaces before finishing.
Step-by-Step Guide to Building Your Wood Veneer Hub
Preparing Your Workspace and Materials
Before diving into the project, ensure your workspace is clean and well-organized. Gather all necessary materials, including your chosen veneers, adhesives, tools, and finishes. Proper organization will streamline your workflow and minimize errors.
Shaping and Cutting Veneer Pieces
Measure and cut your veneer with precision. Use a veneer saw to make accurate cuts that will fit together seamlessly. Remember to account for the substrate dimensions and overlap edges for joining. Precision at this stage is crucial for the final presentation of your wood veneer hub.
Assembling and Finishing Your Hub
Once the pieces are cut, it’s time to assemble the hub. Apply adhesive evenly, ensuring all surfaces are covered. Proceed to align the veneer pieces carefully, using clamps to secure them in place while the glue dries. After assembly, sand down rough edges and apply your chosen finish for a polished, professional appearance.
Common Challenges in Working with Wood Veneer Hub
Dealing with Warping and Cracking
Veneer materials are susceptible to environmental changes, leading to warping or cracking. To mitigate this, store veneers in a climate-controlled environment and use appropriate adhesives. If warping does occur, steam treatment can sometimes restore the veneer’s shape.
Joining Edges Seamlessly
Joining edges in veneer projects can be tricky. Utilize masking tape to hold pieces in place while the glue dries. A veneer trimmer can help to achieve seamless edges by removing excess material for a clean finish.
Achieving a Perfect Finish
To obtain a flawless finish, apply multiple thin coats of varnish or lacquer, allowing each coat to dry thoroughly. Sand lightly between coats with fine grit sandpaper to ensure an even application. This technique enhances the depth of finish and protects the veneer from damage.
Advanced Techniques for Your Wood Veneer Hub
Incorporating Mixed Media
Wood veneer hubs can be enhanced by incorporating mixed media elements such as metal, glass, or fabric. This not only adds a unique dimension to your project but also allows for personal expression. Use proper adhesives for each material to maintain integrity and aesthetics.
Enhancing Durability with Treatments
To improve the lifespan of your wood veneer projects, consider treatments such as waterproofing or UV protection. These treatments safeguard against environmental factors that could lead to degradation, thus extending the usability of your wood veneer hub.
Innovative Uses for Wood Veneer Hub in Design
The versatility of wood veneer allows for innovative design applications, such as creating wall art, decorative screens, or unique furniture pieces. Explore unconventional uses and challenge traditional forms to create striking pieces that highlight the beauty of wood veneer in modern design.
FAQs
What is wood veneer?
Wood veneer is a thin layer or slice of real wood, usually less than 3 mm thick, used for decorative or functional purposes.
Can I apply wood veneer over existing surfaces?
Yes, wood veneer can be applied over most clean and smooth surfaces, but ensure proper preparation for optimal adhesion.
How do I maintain wood veneer finishes?
Maintain wood veneer finishes by cleaning with a soft cloth and using a suitable wood furniture polish periodically to protect the surface.
Is wood veneer sustainable?
Yes, wood veneer is often more sustainable than solid wood, as it uses less material while allowing the use of high-quality wood species.
Can I use wood veneer for outdoor projects?
While some treated veneers can be used outdoors, they are not typically recommended due to susceptibility to moisture unless specifically designed for such conditions.